Create email templates
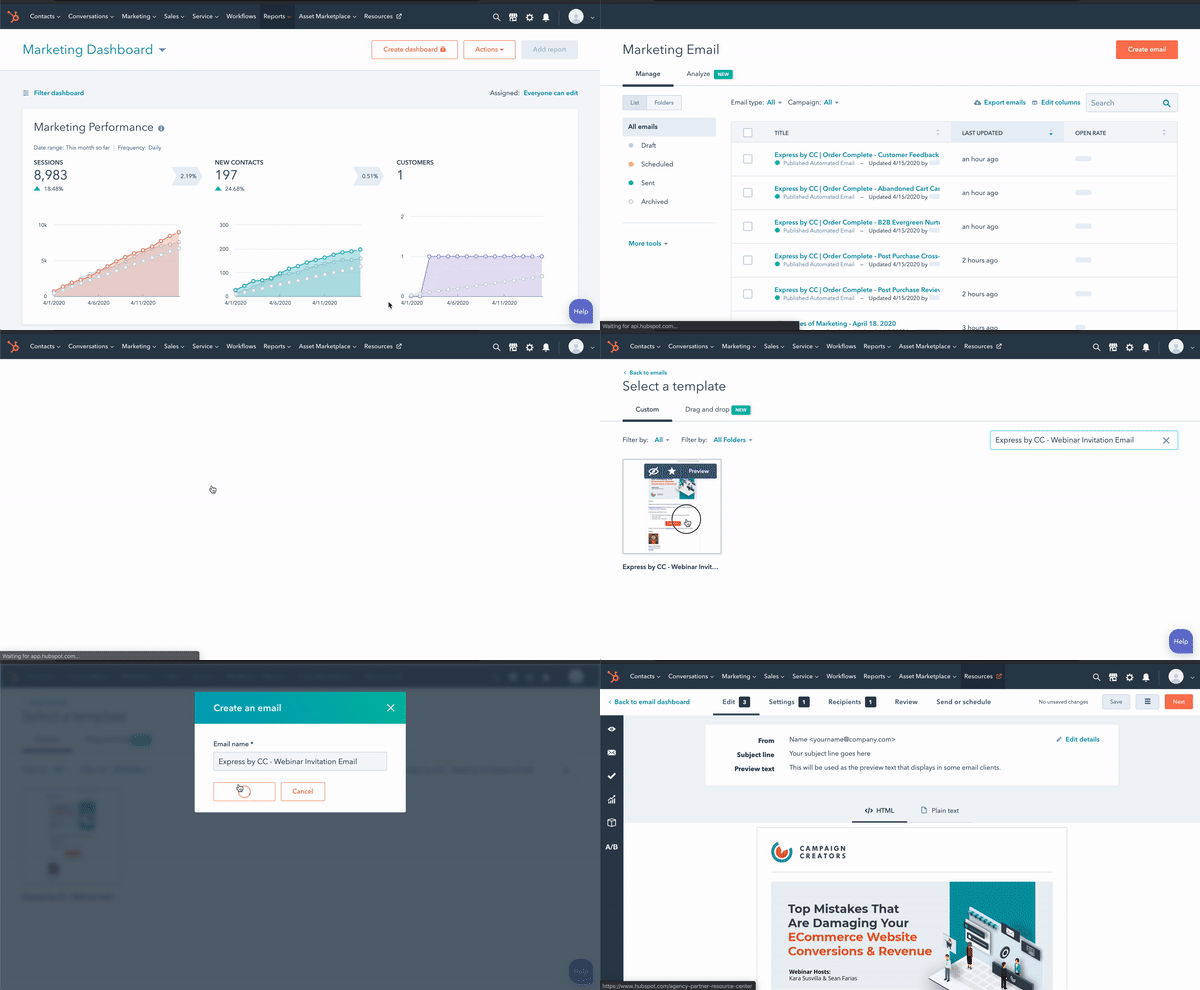
- Inside your HubSpot portal, click on Marketing ➝ Email.
- Click on Create email, then click on Regular.
- Do a search for Express by CC - Webinar Invitation Email, then select the email template.
- Name your email and hit Create email.
- Do the same thing for the following templates and rename them appropriately:
- Express by CC - Webinar Reminder Email
- Express by CC - Webinar Post-Event Email - Attended
- Express by CC - Webinar Post-Event Email - No Show
Create your landing pages
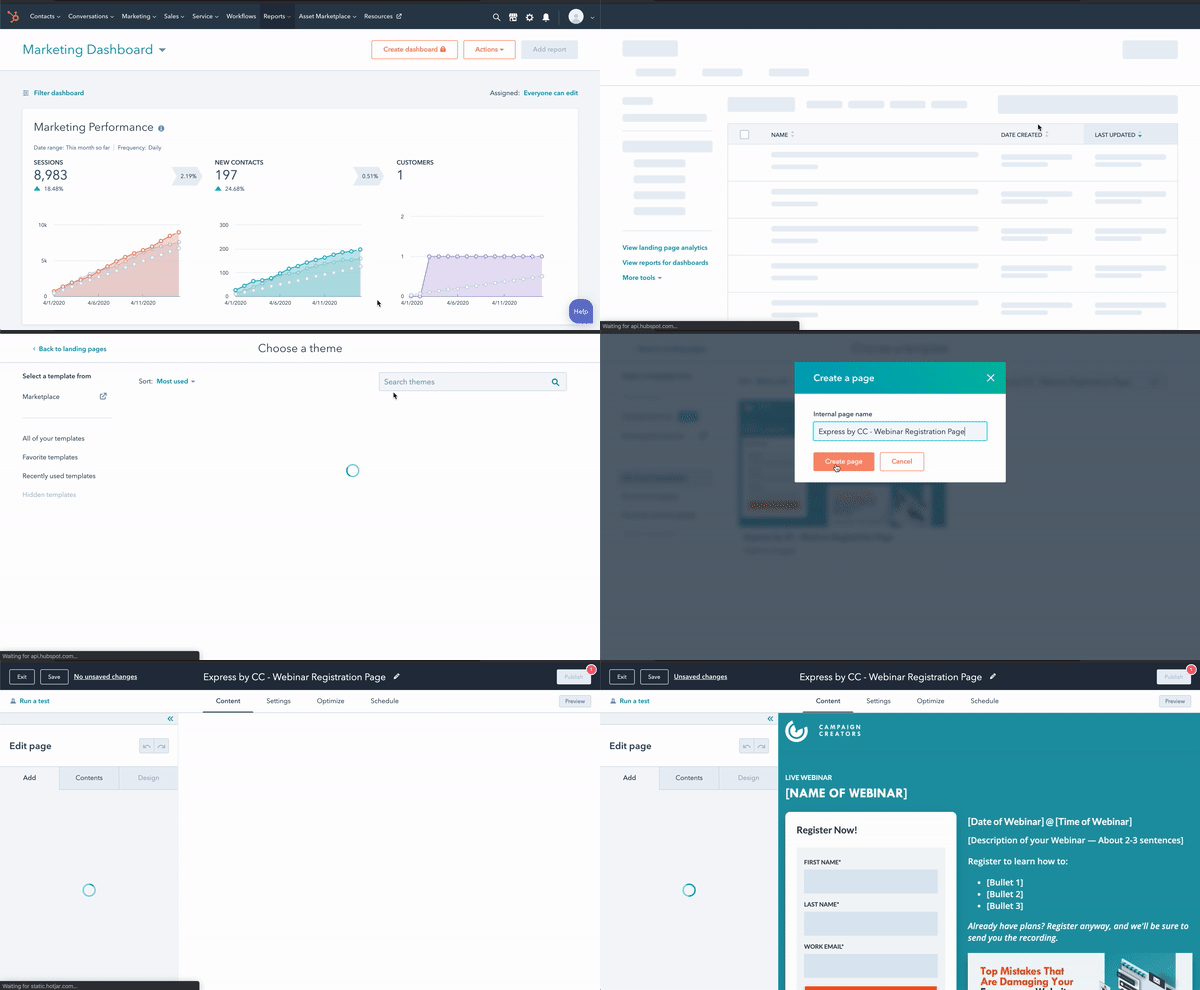
- Inside your HubSpot portal, click on Marketing, hover over Website, then click on Landing Pages.
- Click on Create (orange button), then click Landing page.
- Do a search for Express by CC - Webinar Registration Page, select it. Name your page appropriately, then click Create page.
- If you’re planning on creating a page to host your on-demand webinar after the live webinar is done, do steps repeat the above steps, but do a search for Express by CC - Webinar On Demand Page.
Add form to webinar registration page
- Inside your HubSpot portal, click on Marketing, hover over Website, then click on Landing Pages.
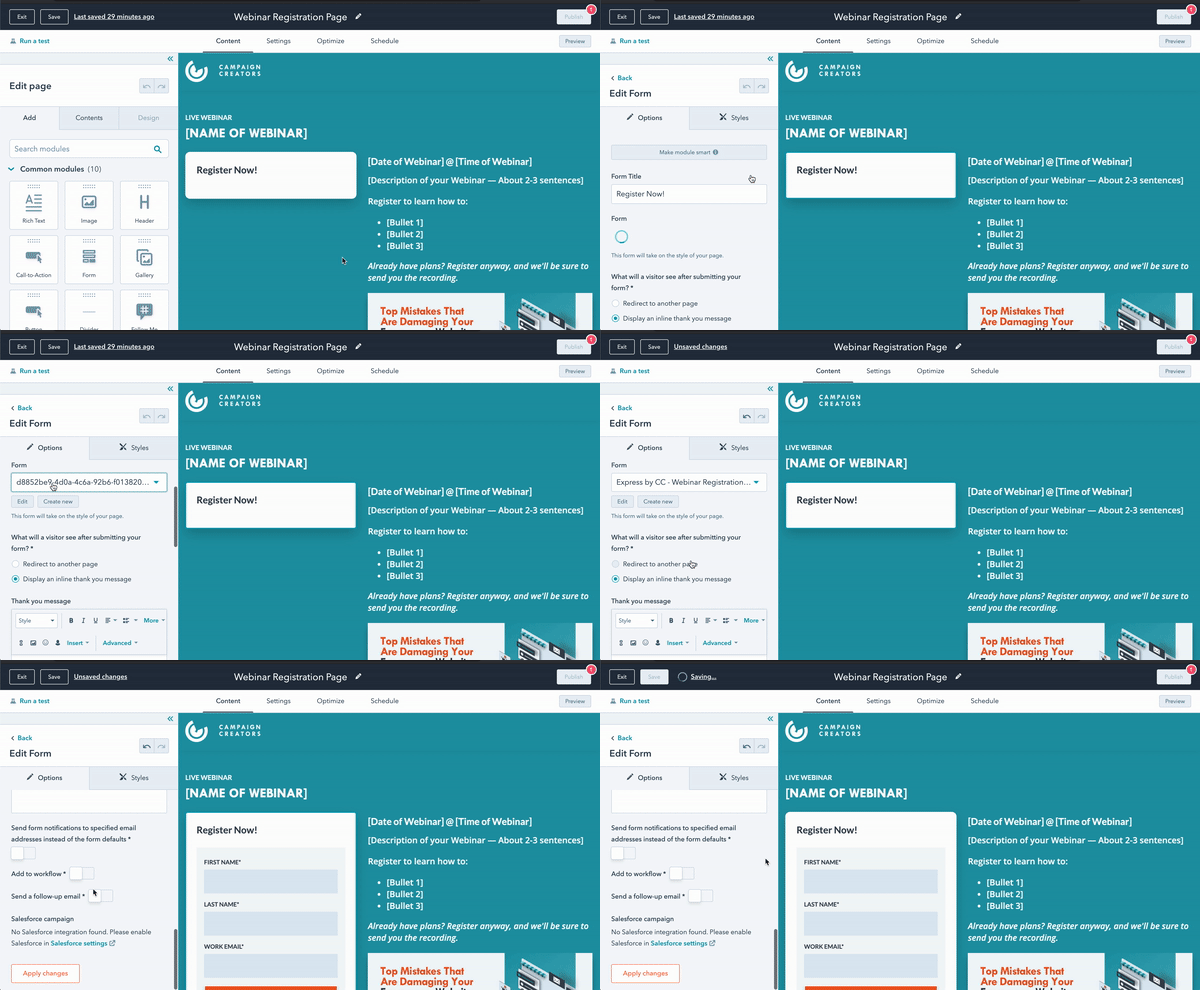
- Do a search for your Webinar Registration page and click on it. You will be taken to the landing page editor.
- Hover over the white area that says “Register Now!” and click. Select the Express by CC - Webinar Registration Form.
- Scroll down and click on Apply changes.
Automate webinar confirmation email
Sending someone their confirmation email right after they registered is important, that way the registrant has info saved and easily available to them. To do that:
- Head on over to your landing pages: click on Marketing, hover over Website, then click on Landing Pages.
- Do a search for your Webinar Registration page and click on it. You will be taken to the landing page editor.
- Hover over the form, and click.
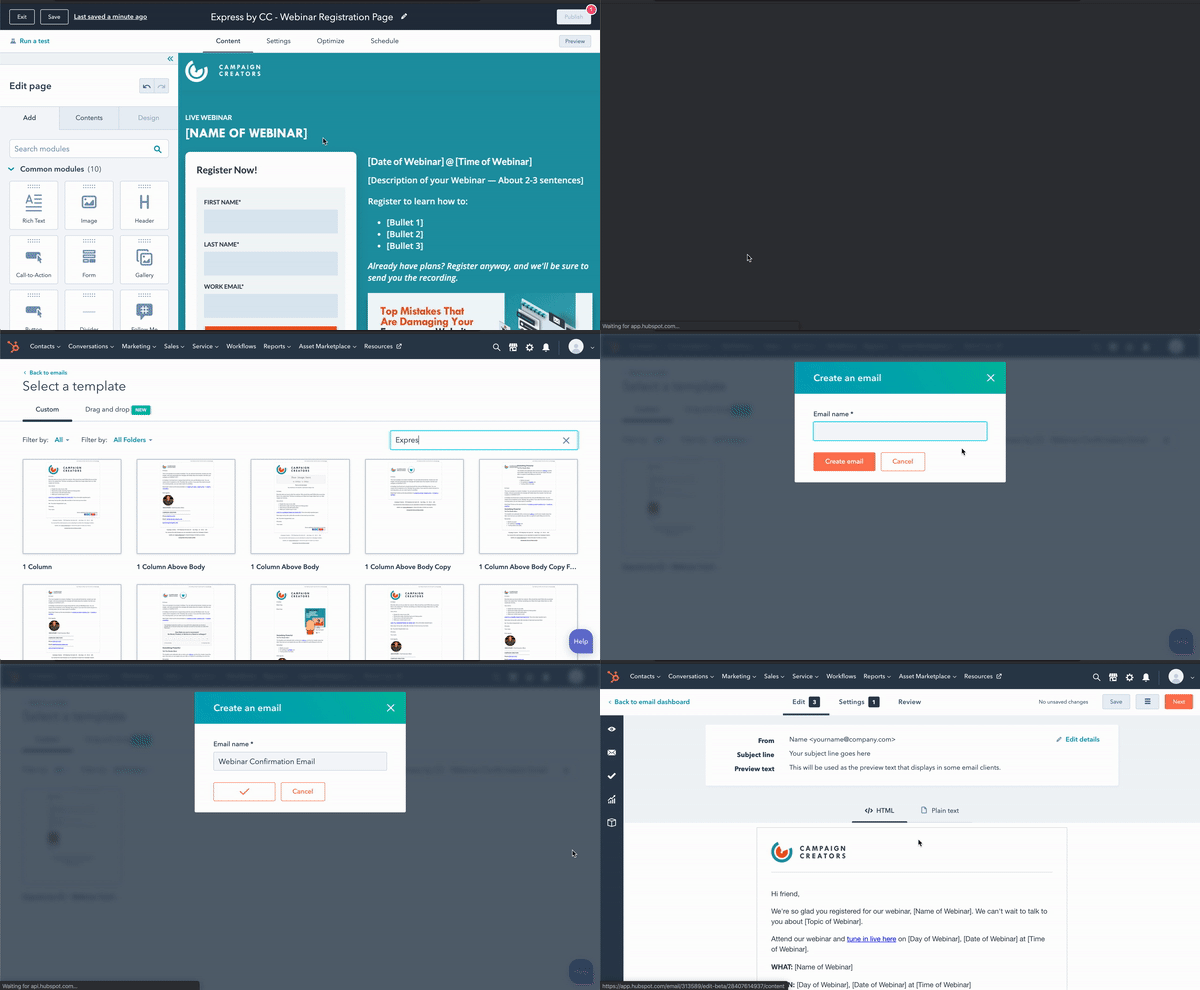
- On the left side, scroll down until you see Send a follow-up email. Toggle on and click on Create new.
- Do a search for Express by CC - Webinar Confirmation Email and click on it.
- Rename your email appropriately and click on Create email.
- You will now be taken to the email editor. Edit your email, and once you’re done hit Publish in the upper right corner. And hit Publish email.
- Go back to your landing page and ensure that the email you created is selected.
- Click on Apply changes. Now every time signs up for your webinar, they will immediately be sent a confirmation email with details of the event.
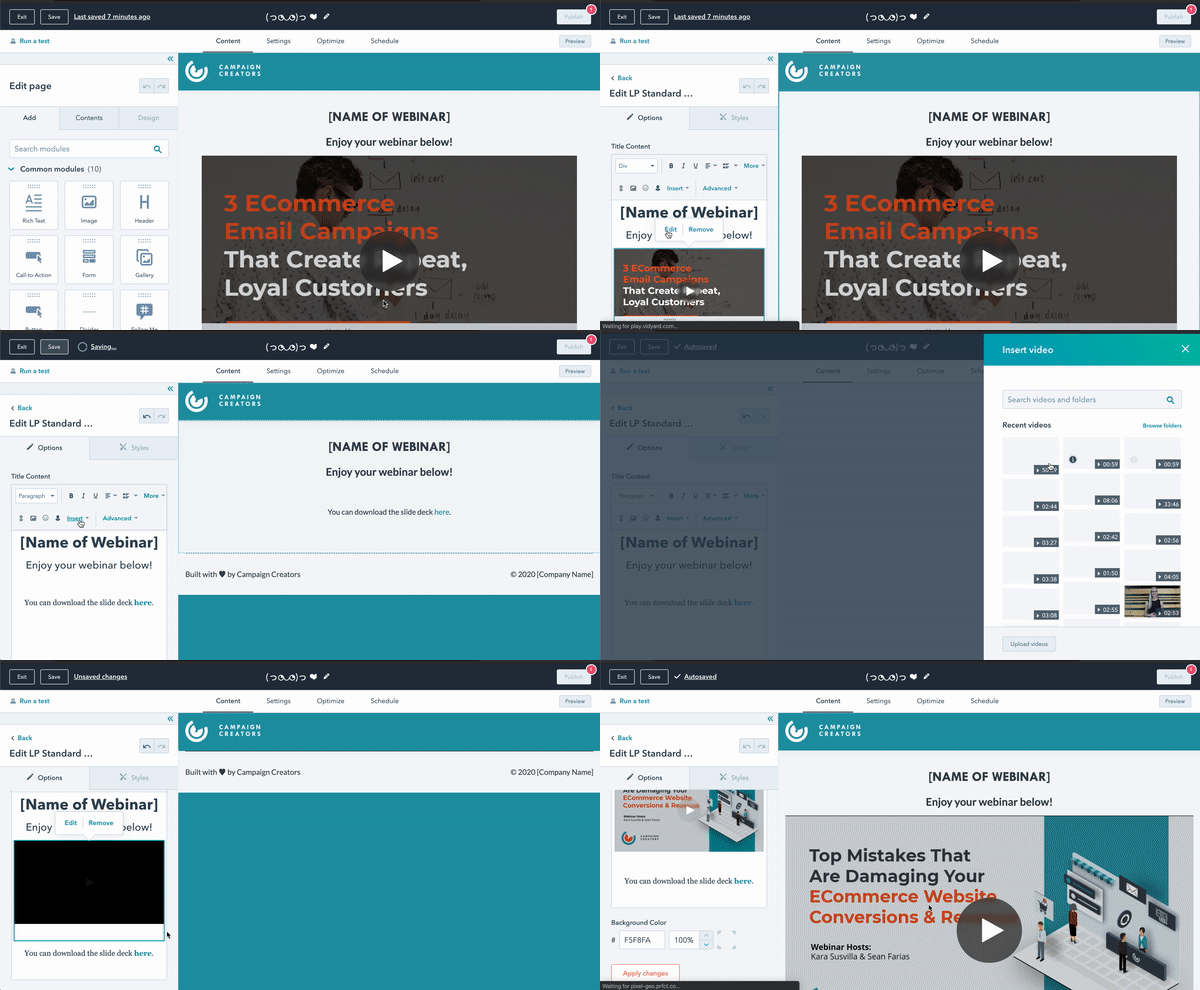
Swap the video on the on-demand webinar landing page
- Inside your HubSpot portal, click on Marketing, hover over Website, then click on Landing Pages.
- Do a search for your Webinar On Demand page and click on it. You will be taken to the landing page editor.
- Hover over the first section of the landing page and click. An editor will pop up on the left side.
- Click on the video and click Remove.
- Replace with your own video by clicking Insert ➝ Video ➝ HubSpot video or External video.
- If using a HubSpot video and you already uploaded it, simply select on the right side. If you haven’t uploaded yet, click on Upload videos at the bottom, and upload your video from your computer. Select your video and it should be on the page now.
Have additional questions? Email us at support@campaignwizard.io.
.png)
.png)
/webinar-campaign-illustration.png?width=400&height=330&name=webinar-campaign-illustration.png)


